

Create a Virtual Machine for Exadata CELL or Storage Server
In this topic will demonstrate how to configure Cell or Storage Server for Exadata. Very few companies are using Exadata Engineering system so this is very difficult for a DBA to get an environment to explore. So Exadata simulation will be a good option to learn.

- Download Required Software
- Hardware Requirements
- Create a Virtual Machine
- Install Oracle Linux
- Prerequisite for Exadata Storage Server
- Install the Exadata Storage Server Software
- Clone Storage Server for 2nd VM of Exadata Storage Server (exadatacell02)
- Create Cell disks and Flash Cache storage for Exadata Storage Server on Node 1
- Create Cell disks and Flash Cache storage for Exadata Storage Server on Node 2
- Install Oracle Grid and Database
Oracle Doc: Exadata Database Machine and Exadata Storage Server Supported Versions (Doc ID 888828.1)
Software Version:
- Oracle Storage Server Software: 12.1.1.1.0
- Oracle Linux 6.8
- Oracle GI and Database: 12.1.0.0.0
- JDK 1.7
Step 1: Download Required Software:
- Download Oracle VM and Install: VM Box
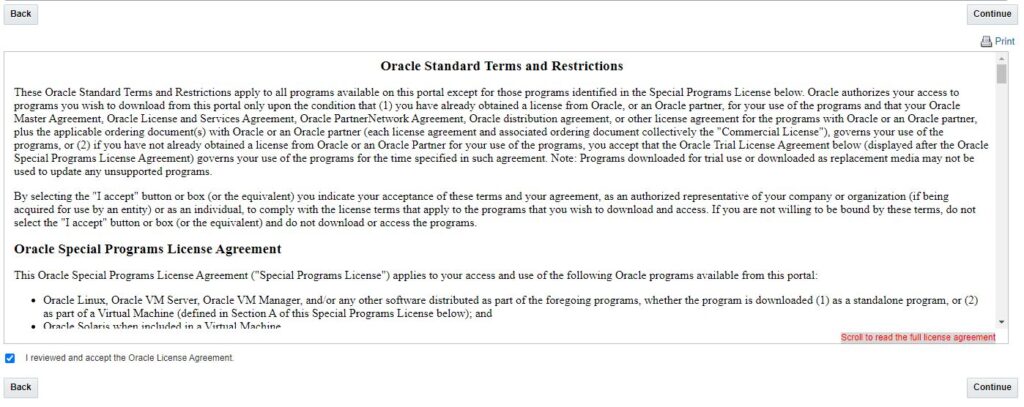
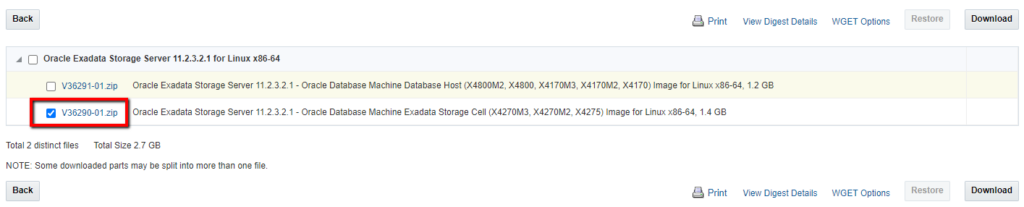
- Download Exadata Storage Server Software form Oracle: Download
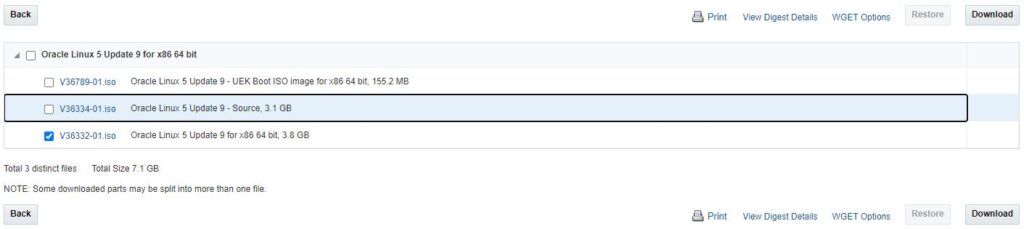
- Download Oracle Linux: Oracle Linux
1.1. Download Oracle VM and Install: VM Box
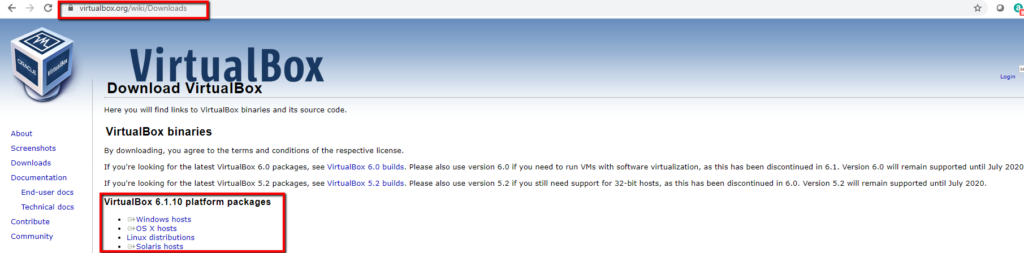
1.2 Download Exadata Storage Server Software form Oracle: Download


1.3. Download Oracle Linux: Oracle Linux

Step 2: Hardware Requirements:
- Virtual Machine: At least 2 Storage Server and two Compute Nodes on VM
- Memory: At least 4 GB memory is required for Storage Server and 2-3 GB for DB Server. So for 4 VMs, need around 12-14 GB memory
- Storage: Storage Server -> 40 GB x 2 = 80 GB and Compute Node: 40×2 GB = 80 GB. Total around 160 GB
Environment:
- Storage Server:
- CELL Node 1:
- Host Name: exadatacell01
- Public IP: 192.168.56.60
- Private IP: 192.168.2.60
- CELL Node 2:
- Host Name: exadatacell02
- Public IP: 192.168.56.70
- Private IP: 192.168.2.70
- CELL Node 1:
- Compute Node:
- Compute Node 1:
- Host Name: exadatadb01
- Public IP: 192.168.56.80
- Private IP: 192.168.2.80
- Compute Node 2:
- Host Name: exadatadb02
- Public IP: 192.168.56.90
- Private IP: 192.168.2.80
- Scan IP:
- 192.168.56.30
- 192.168.56.40
- 192.168.56.50
- Compute Node 1:
Step 3: Create a Virtual Machine: exadatacell01
How to create a VM: Create a Virtual Machine
Step 4: Install Oracle Linux on VM
Step 5: Prerequisite for Exadata Storage Server:
5.1. Add IP and Hostname on /etc/hosts file.
5.2. Set Kernel Parameters:
5.3. Disable Firewall and SELinux
5.4 Create Directories:
5.5. Load RDS Kernel Modules:
[root@exadatacell01 /]# modprobe rds
[root@exadatacell01 /]# modprobe rds_tcp
[root@exadatacell01 /]# modprobe rds_rdma
#Add below line to /etc/modprobe.d/rds.conf
[root@exadatacell01 /]# cat /etc/modprobe.d/rds.conf
install rds /sbin/modprobe --ignore-install rds && /sbin/modprobe rds_tcp && /sbin/modprobe rds_rdma
5.6. Remove the conflicting installation package if it already exists
Step 6. Install the Exadata Storage Server Software
6.1. Copy software from your local disk to VM and unzip the software. You may use winscp software to copy on VM.
6.2. Unzip cell.bin
6.3. Install JDK
6.4. Install required packages for CELL rpm:
If you have internet connection on VM then you will able to run below command. Otherwise you need to configure yum server manually.
Note::: Node one is ready to install Exadata Storage Software. As we are planing to configure two Nodes for Storage, So Better to make clone of Node 1 for Node 2 then don’t need to prepare Node 2 again.
Step 7. Clone Storage Server for 2nd VM of Exadata Storage Server (exadatacell02)
7.1. Clone the Server of (exadatacell01)
7.2. Change the hostname
7.3. Change the IP for 3 Network Interface
How to Clone VM
Step 6. Install the Exadata Storage Server Software (Continue…)
6.5. Set environment variable for correct version of Java
6.6. Install Exadata Storage Server RPM
6.7. Validation
CELL-01533: Incorrect IP in cellinit.ora. IP is invalid or has incorrect/missing netmask: This error is generating because of missing the ipaddress1 parameter on cellint.ora file.
6.7.1. RS, CELLSRV and MS Services have been started successfully
Step 8: Create Cell disks and Flash Cache storage for Exadata Storage Server on Node 1
- Create 10 disks of 1024 mb – these are for the Cell disks
- Create 4 disks of 600 mb – these are for the Flash disks
8.1. Add 10 storage for cell disks
8.2. Add 4 storage for Flash Disks
8.3. Run these command using cmd command prompt
8.4. VM Machine
- VM Name: exadatacell01
- Path of VM C:\VM\exadatacell01\
8.4.1. For Cell Disk
Note::: VM Name and Path may need to change for your case for below script.
8.4.2. For Flash Disk
8.5. Create directories for the Storage Server physical disks:
8.6. Create Symbolic Disks/Links:
8.6.1 Create Script for symbolic links
8.7. Ready to Create Storage cell
8.7.1. Connect with CELLADMIN and Create the Storage cell
Note::: Getting above error or because of CELLSRV already running. So need to stop CELLSRV service
8.7.2. Create Cell Disk
8.7.3. Show Created Cell Disk
8.7.4. Show Created Flash Disk
8.7.5. Few important commands


